I’ve been getting a lot of questions about what I’m using in my home office, so I’ve finally decided to document everything here.
Design Decisions
I had a few core design criteria when I started.
- I wanted the entire setup to be relatively static. I don’t have any need for things like monitors to pivot around, so quick adjustability is not important.
- I want a cozy, warm, and inviting feeling to the office. I spend the vast majority of my time here, so it’s got to feel like a place I want to be.
- The desk must be super clean and clear of cables. That includes the back of the desk, too.
- The view on-camera must be interesting. I worked from home pre-pandemic too, and that won’t be changing. Given that I’m starting to make more public appearances, my on-camera view must look great.
The Floorplan
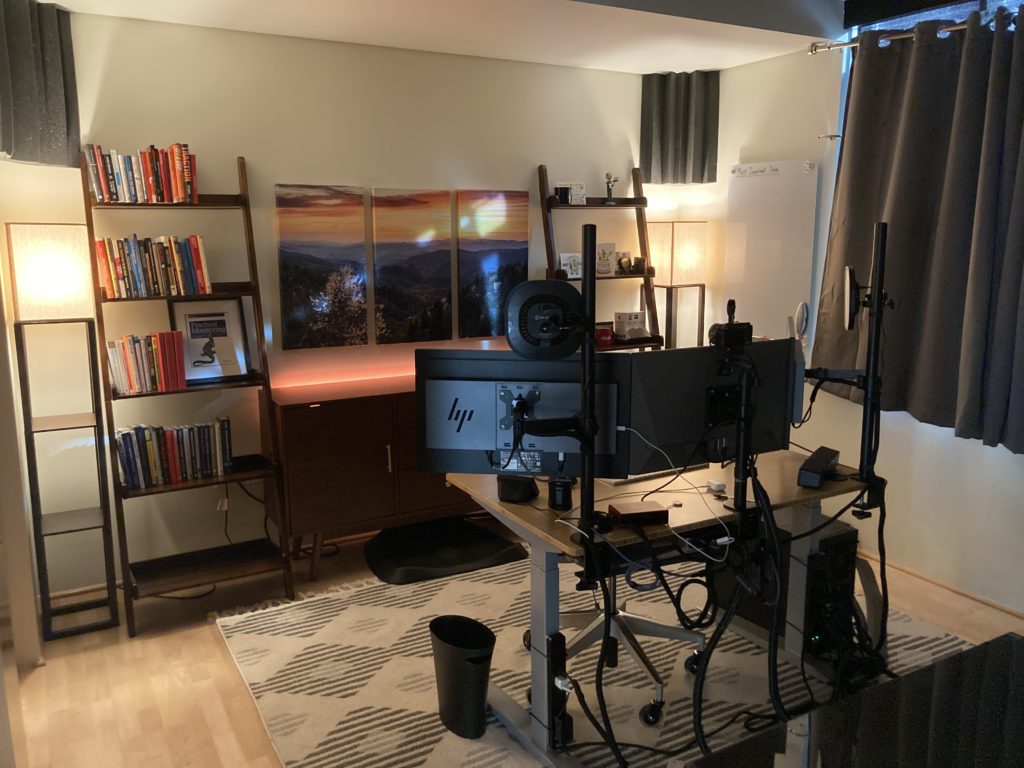
This is the largest home office I’ve had so far and it’s been quite nice having so much room to work with.
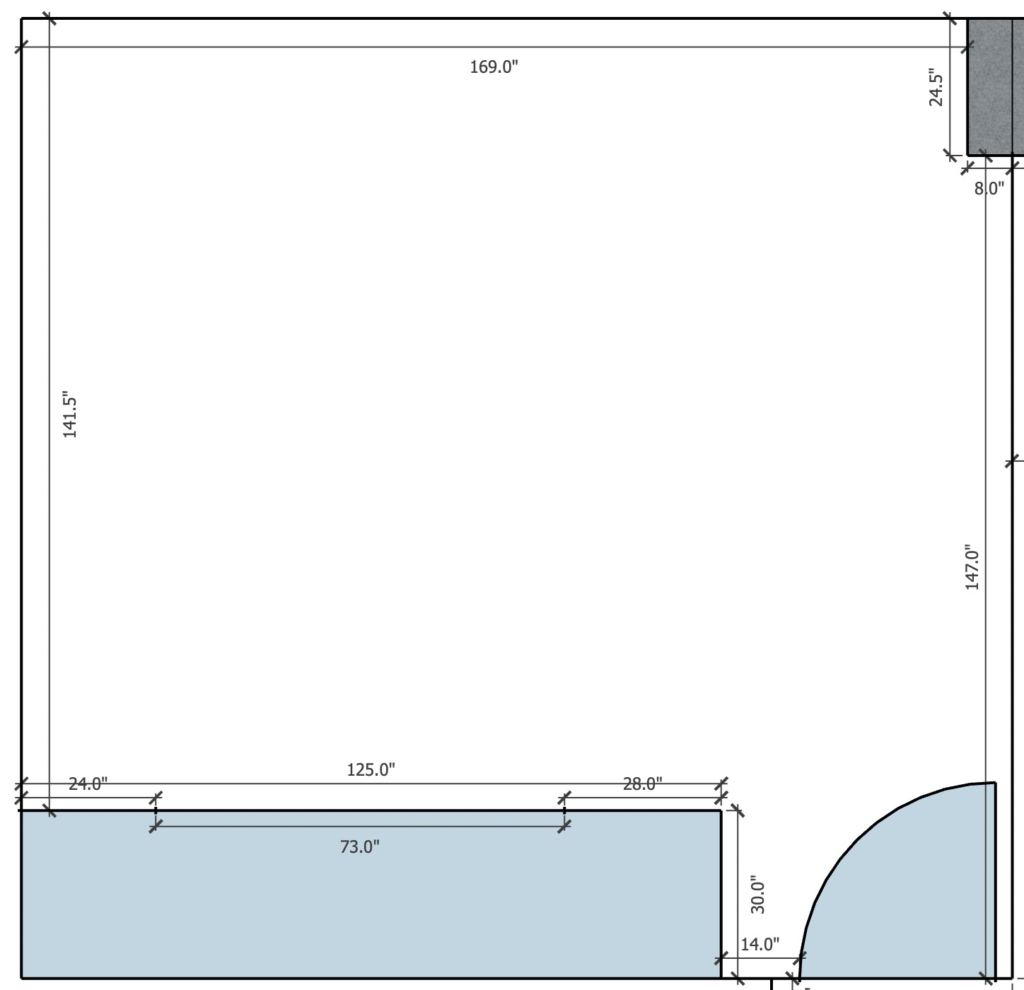
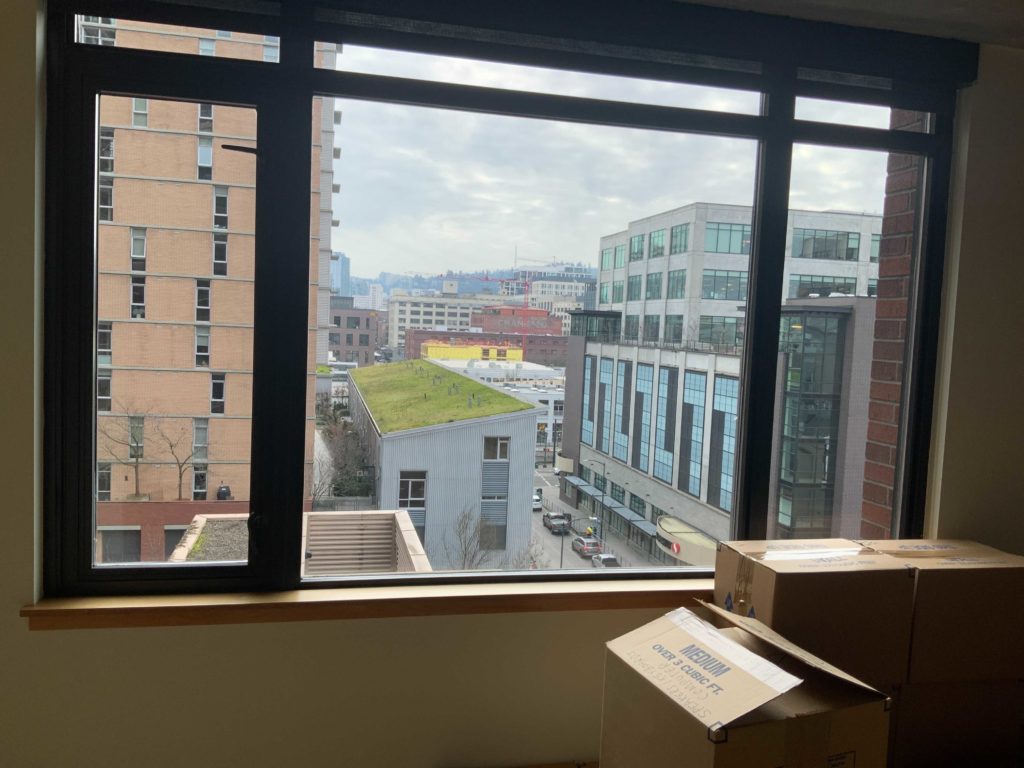
I first started with just a basic floorplan drawing I put together in SketchUp Pro. The window in the room is huge (108″ long, 63″ tall) and south-facing. While that brings a ton of natural light, it also creates some issues when on-camera (I’ll get into what I did about it later in this article).
I don’t like having my back to the door, so putting the desk facing the window wasn’t an option and same for facing the east wall. Facing the west wall would mean the door was to my right, which didn’t seem too terrible, but it would leave a huge amount of open space behind me, which I didn’t like.
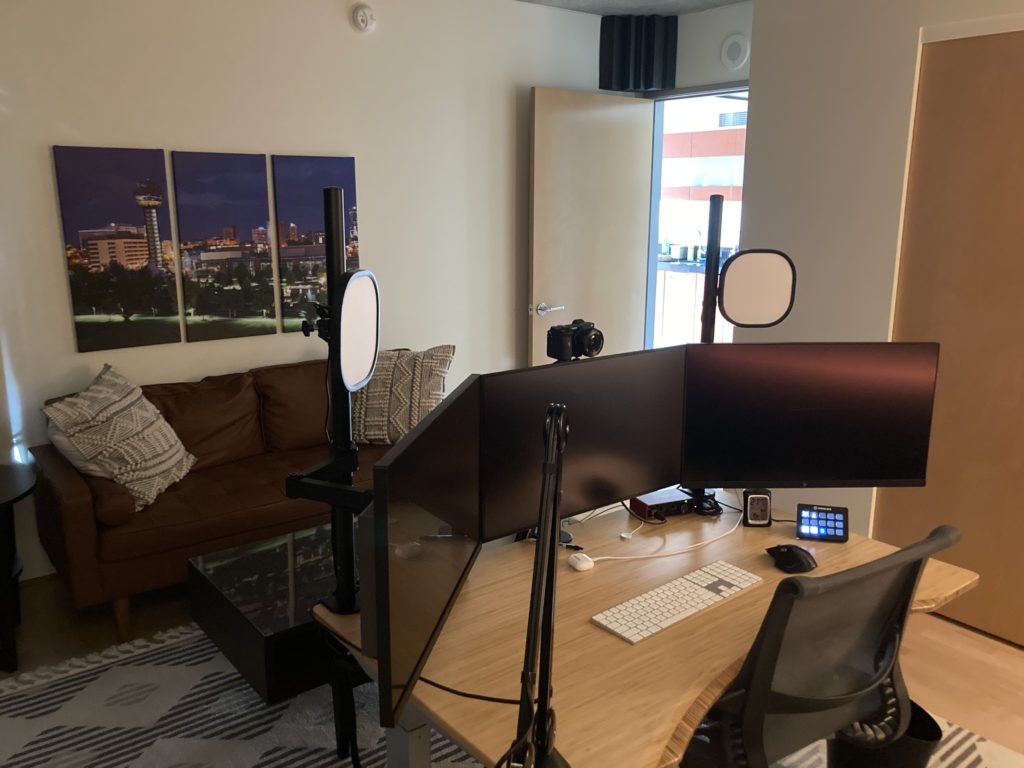
I opted to put my desk in the middle of the room, facing the west wall. This left me room for a couch and coffee table off-screen and a decent amount of room for furniture in the on-camera field of view.
The downside of this desk placement means that cable management becomes crucially-important, since all the desk cables are immediately visible to anyone in the room.
The Furniture
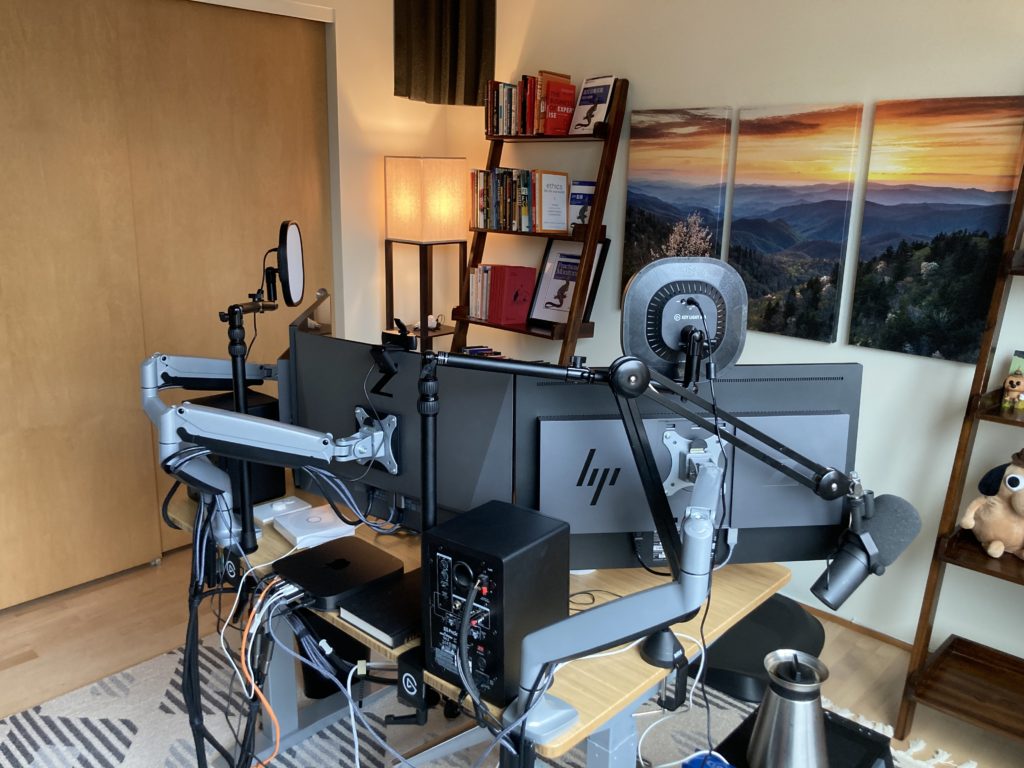
The core pieces of the office are two items I already owned: my desk and office chair.
The desk is a Fully Jarvis with a bamboo top. I’ve owned it for about two years by the time I moved to this office and it’s been great.
The chair is a Herman Miller Setu. I bought the chair in 2013 and it’s held up great since then. I replaced the wheels with rollerblade-style wheels recently and that definitely improved maneuverability a ton. These wheels are a direct-fit replacement for the originals.
The original intent with the chair was to have something that looked nice, was comfortable for long periods of time, and didn’t have a bajillion knobs to tweak. The Setu is a fairly simple chair: there’s a rocker on the bottom for up and down and that’s it. The back leans backward with ease, though not deeply like you might be accustomed to with the Aeron or similar. The Setu is one of those chairs where you’re forced to sit properly or not at all–a great thing but also sometimes annoying when I want to just be lazy.
The artwork is from an Etsy shop that sells canvas prints, though I’m not sure who the photographer is. The mountain shot is the Smoky Mountains taken in Cherokee, North Carolina, while the skyline shot is Knoxville, TN taken from The World’s Fair Park.
Everything else in the office is either Wayfair or IKEA.
The Computer Gear
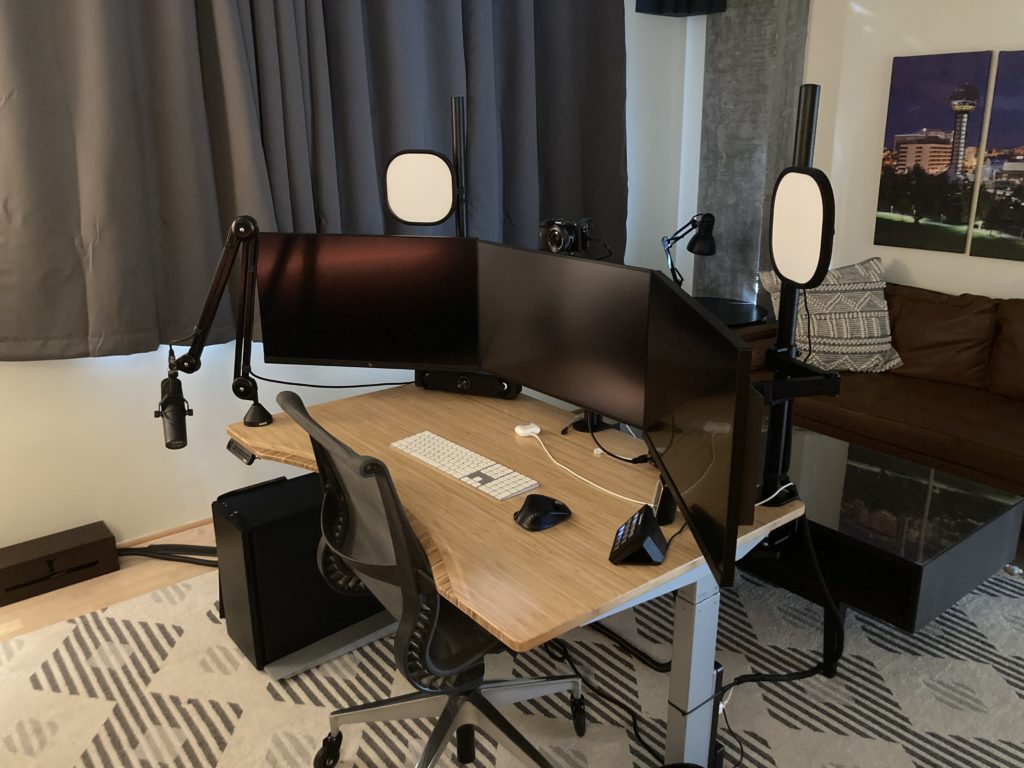
I use three HP Z27 27″ 4K monitors. I know a lot of people really like ultra wide monitors these days but for whatever reason, I just like multiple monitors instead. I think it might stem from my time as a Windows sysadmin thanks to Windows having awful window management. As most Windows sysadmins will attest, you quickly get used to maximizing every window and dedicating entire monitors to certain windows/applications. I’ve kept up that habit.
My computer is a 2018 Mac Mini with 64GB of memory and it’s great. I think Mac Minis are under appreciated. While I own a laptop, it always felt silly to use a laptop as a desktop machine. A Mac Mini solved a lot of pains I had with constantly moving the laptop around every day and allowed me to build a more permanent computer setup. Update Nov 2023: I’m now using a 2022 Mac Studio with the M1 Ultra chip and 128GB of memory.
As for the Elgato Stream Deck 15-Key, I mainly use it to control the lights and Zoom. It’s pretty great, despite my under-use of it.
The Audio Gear
I originally was thinking I’d use a shotgun mic and mount it from the center pole, that way I could have a great mic that’s never on-screen. Sadly, the Synco D2 I bought never lived up to my expectations. I’m sure it’s a great mic but I just couldn’t get the audio quality I wanted without having to do a ton more audio treatment to the room.
So, I switched back to my trusty Shure SM7B. It’s a great mic. That’s mounted on a Rode PSA1 mic arm.
I have it plugged into a dbx 286S channel strip. The channel strip lives in the cabinet behind me and does various audio processing, such as audio gating and de-essing. I configured the dbx for my specific use case (spoken word) and mic and then haven’t touched it since.
The cable routing here is a bit interesting: an XLR cable runs from the mic to the dbx, then another XLR cable from the dbx to the FocusRite Scarlett Solo 2 3rd Gen audio interface on the desk. It’s effectively just two cables following the same routing along the wall–about a 20′ run. This allows me to keep a somewhat large piece of equipment out of sight and off the desk at the expense of just some simple cable management work.
Update Nov 2023: I’ve replaced the dbx 286S and Scarlett Solo 2 with an Apollo Solo and a Cloudlifter CL-1 to increase the power on the Shure SM7B. While it’s a more expensive setup overall, it simplifies my setup significantly and gives me greater control over the audio sound.
The Video Gear
I originally started with a Logitech C920S HD which is a perfectly serviceable webcam. However, when I started being more public with Duckbill, I wanted to really amp up the quality of my video.
My business partner happened to have an extra Sony A6600 from another project we had done, so that’s what I went with. The lens is a Sony SELP 1650 lens and comes with the camera, which works perfectly fine for my purposes, and it’s hooked into the computer using an Elgato CamLink 4K.
Lighting-wise, I consulted with Danielle Leong. After sending a few photos of myself on camera at different times of day, I was instructed in no uncertain terms to never use the overhead lighting again. 😂
Switching to floor lamps really changed the feel of the room for the better, and adding two Elgato Key Light Airs in front of me improved things even further. I also added a strip light from Philips Hue to the back of the cabinet for some added ambient light.
Mounting Everything
My goal was to have the monitors, lights, and camera all mounted to the same poles. In other words, I wanted three mounting arms, not six. I also didn’t mind if everything wasn’t easily adjustable since I never move anything once it’s set. That meant I had to find some sort of pole mounting system. That proved more difficult than I imagined, mainly because there’s a lot of crap out there.
I finally settled on 2x 31″ pole arms from WALI and 1x WALI “single arm mount”. The single arm mount is shorter than the other two because I didn’t want a giant pole sticking up directly in the middle of my view and I knew I wanted the center monitor as close to the pole as possible to create as much room on the desk as I could.
I then use three ULANZI SuperClamps to attach the two Key Light Airs and the Sony A6600 to the pole arms. These mounts are shockingly sturdy with some tremendous clamping power, and they’re small/unobtrusive enough that I don’t notice them at all.
Organizing The Rat’s Nest Cables
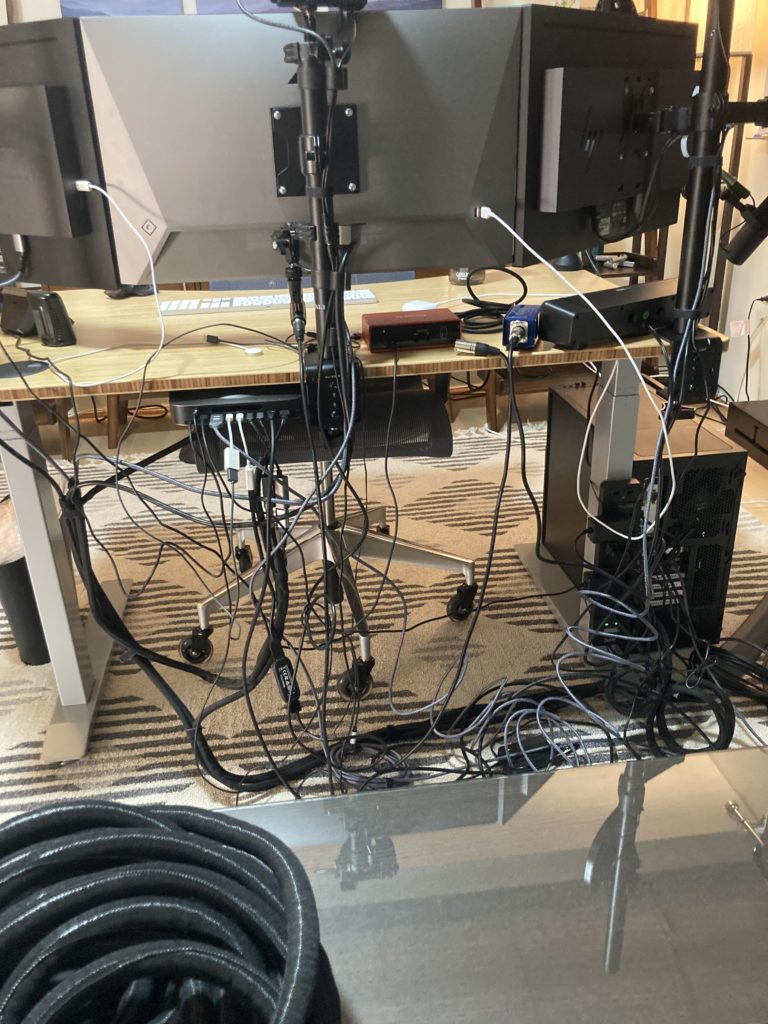
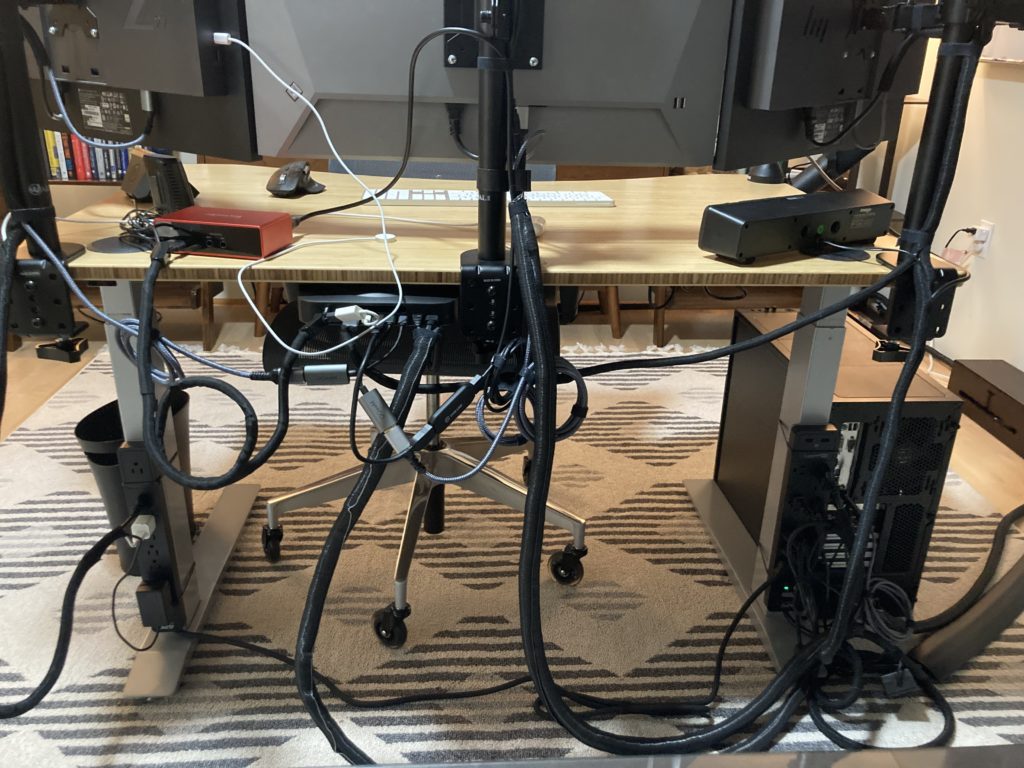
I love doing cable management. In a past life, I did a ton of data com/telecom work and I spent inordinate amounts of my time tidying up network racks.
To say I have Opinions™ on cable management is an understatement.
The biggest issue with cables for me stems from a decision I made at the very start: my desk faces into the room. That means whatever I do with the cables has to look amazing because it will be very visible to anyone in the room.
When you’ve got a network rack where everything is basically the same stuff, making the cables look good is just a matter of not fucking it up. Seriously, it’s really not hard.
However, when you’ve got a bunch of stuff that’s all different, such as, say, a computer desk with a bunch of AV gear on it, you’re in for a world of pain and misery.
Knowing that I can’t make the cables pretty like with a network rack, I have to settle for tidy. Tidy generally means clean, organized, and as few of them as possible.
That means I need two things: hook-and-loop and cable wrap.
My favorite hook-and-loop is from 3M. I discovered this particular stuff in 2010 when I was doing a bunch of datacenter build-outs and my local Grainger sales rep introduced it to me. Most hook-and-loop is super thick and that makes it difficult to work with and doubly difficult to organize cables in a tight space. Not this stuff, though! This is incredibly thin and pliable. Perfect for organizing cables. Thankfully, you can buy it from Amazon at the link above. I order multiple 1/2″ 50′ rolls–the rolls are compact and can be easily stored when you’re not using them. Trust me, once you try this stuff you’ll find uses for it everywhere.
The cable wrap took some time. I knew I wanted split wrap and I wanted something that was high-quality. I tried a bunch of stuff from Amazon but it was all garage. I finally settled on TechFlex F6 woven wrap. I ordered 50′ of 3/4″ and 25′ of 1/2″. I also had some 1/4″ woven wrap from another brand I liked that was leftover from a previous project.
Wrapping cables together is just a lot of trial and error to see what looks good. The one tip I have is to consider that sometimes a longer run will look better than a shorter run, so don’t feel compelled to route a cable in the most direct manner. In some cases, I bought longer cables to make the cable organization look better.
Most of the cables were wrapped with 1/4″ or 1/2″ loom, and I mainly used the 3/4″ wrap for two things:
- Running 2x XLR cables and 2x CAT8 cables from the desk, around the side of the room, and to the cabinet on the east wall. This is where the network switch and dbx 286s are located.
- Wrapping bundles of 1/4″ and 1/2″ loom together.
I ended up running out of the 1/4″ and 1/2″ wrap and had a ton of 3/4″ wrap leftover. Your mileage may vary.
Sound Treatment
Acoustics are something a lot of people gloss over or forget entirely when doing a home office. Audio processors and great mics can do an incredible amount for your audio, but there really is no replacement for improving the acoustics of a room.
I’m certainly no expert on acoustic treatment, but here’s what I did:
- Bass traps in the ceiling corners. I got mine from Amazon.
- Acoustic curtains on the window. I purchased these from RYB on Amazon. Due to the size of my window, I had to buy two sets to have enough coverage over the window.
- Add soft things to the room. I have a floor rug that spans almost the entire room, plus a couch.
The acoustics in the room aren’t perfect by any means, as I’d need to add some sound panels to the ceiling but my ceiling is concrete (I live in a condo), so that’s a no-go with my building management. That said, I still routinely get compliments on how I sound, so I think it works out.
What’s Next
I am very pleased with how all of this turned out and I’ve been living with it for a few months now.
One thing that is still annoying for me is that my mic arm has to swing in from the side when I want to use it. It’s not a huge issue, but a minor annoyance. I’m not sure how to improve that yet.
Other than that, I love the setup and it’ll likely stay this way for quite some time.
And in case you’re curious, here’s what the office looked like before this redesign!